Worried that staging will scrub away the soul of your Carmel cottage? You are not alone. In 93921, buyers fall in love with handcrafted details and garden courtyards just as much as a light, airy look. The good news is you can protect your home’s character while making it shine in photos and in person. Here is a room-by-room guide designed for Carmel-by-the-Sea that preserves charm, boosts light, and supports a premium listing. Let’s dive in.
What to preserve in Carmel cottages
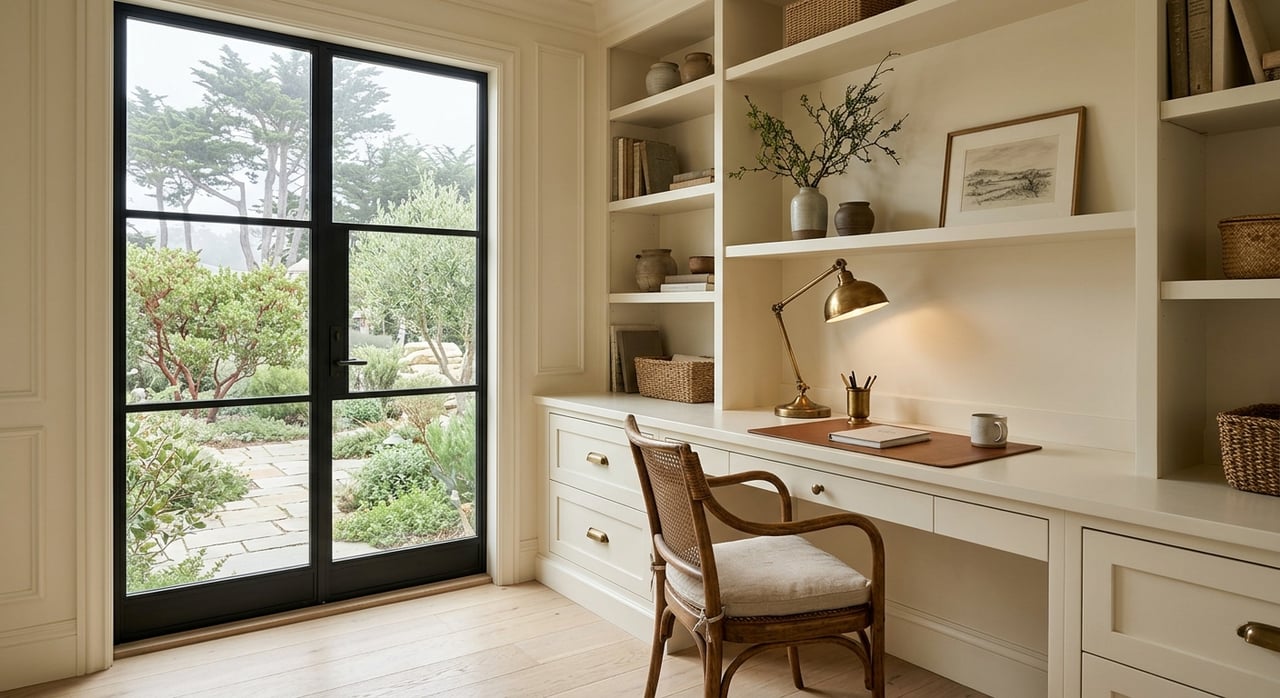
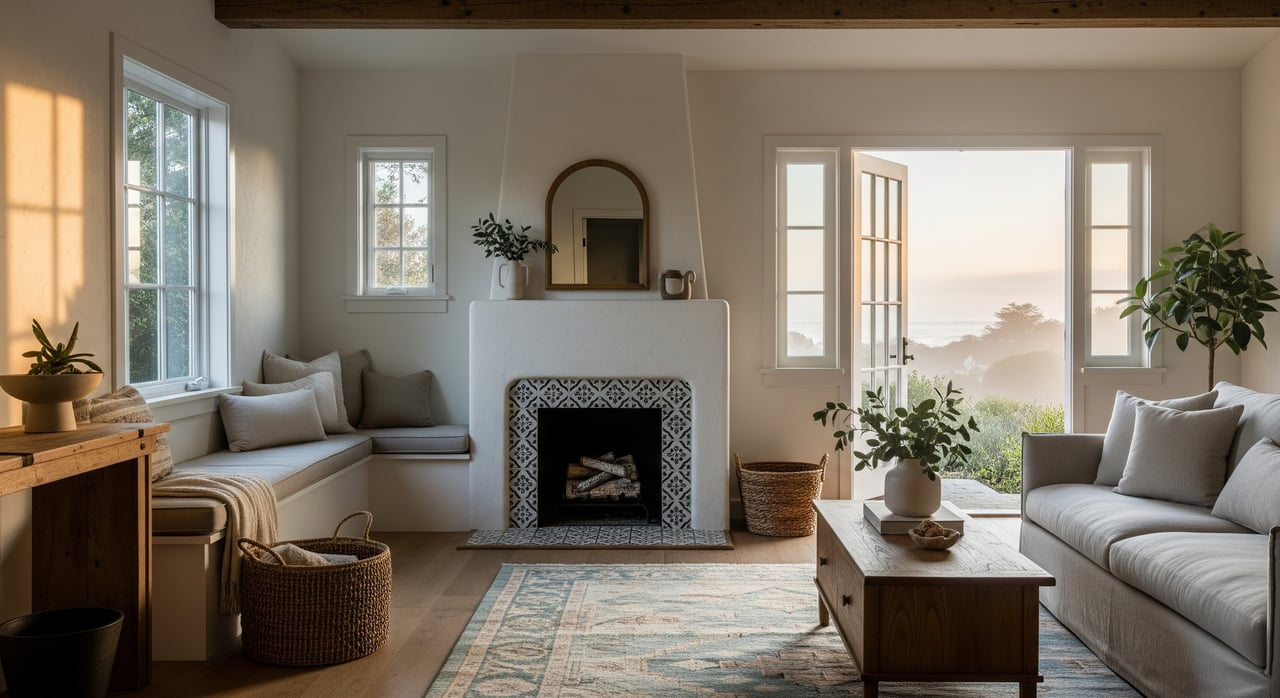
Carmel-by-the-Sea cottages often feature textured plaster, exposed beams, built-ins, leaded or divided-light windows, and small-paned French doors. Many homes also include stone or wood-burning fireplaces, low ceilings, and irregular floor plans. These details are value drivers when presented thoughtfully.
Mature landscaping and intimate courtyards are part of the lifestyle buyers seek here. Stage with the indoor–outdoor rhythm in mind so the garden feels like another room. Keep the original patina where it exists, from vintage hardware to period tile, and make it a focal point instead of hiding it.
Staging principles that honor character
Preserve original features
- Treat fireplaces, beams, built-ins, and leaded windows as star features, not obstacles.
- Use reversible updates only. Think rental furniture, removable hooks, slipcovers, and freestanding lighting.
- Clean and gently restore original hardware and finishes. Avoid permanent changes that affect historic fabric.
Maximize light and space
- Replace heavy drapery with sheer or linen panels to invite daylight.
- Add mirrors or reflective accents to brighten compact rooms without feeling staged.
- Keep wall and upholstery tones light and neutral to complement wood and stone, not erase them.
Respect scale and sight lines
- Right-size furniture for smaller rooms. Use low-profile seating and slim consoles.
- Create clear pathways to show natural flow from entry to living to kitchen and out to the garden.
- Keep accessories edited and intentional so architecture leads.
Emphasize indoor–outdoor living
- Stage courtyards and patios as furnished rooms to expand perceived square footage.
- During photos or showings, open doors to patios when safe and weather-appropriate to showcase access and views.
Blend comfort with vintage details
- Pair neutral, modern comforts with artisanal touches like woven textiles, brass accents, or framed vintage prints.
- Spotlight move-in readiness with bright, layered lighting while keeping the overall palette calm and cohesive.
Room-by-room tactics
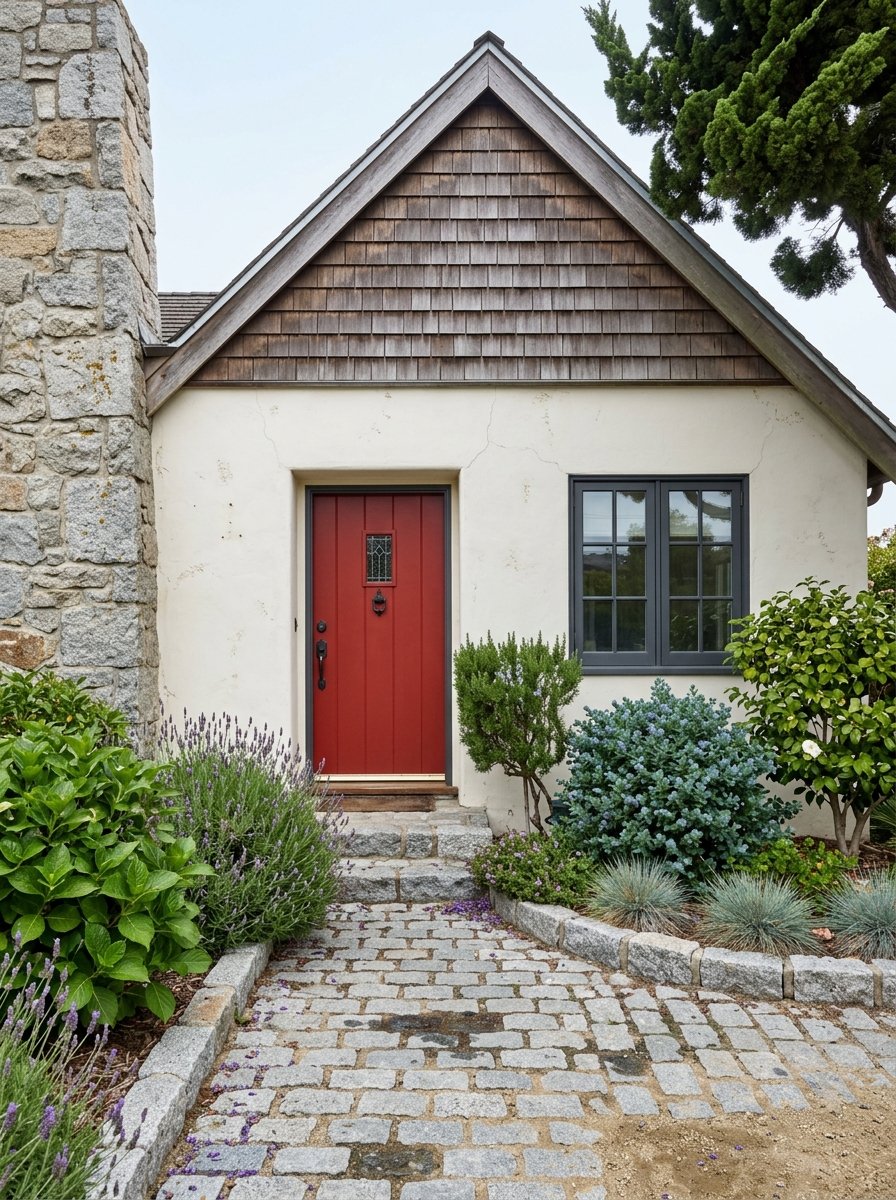
Exterior and entry
- Refresh pathways and steps. Tuck away hoses and tools to create a clean approach.
- Prune to reveal the façade and entry, but avoid cutting back mature character plantings too hard.
- If the door needs it, consider a period-appropriate paint color. Clean and polish original hardware. Replace non-original pieces only with reversible options.
- Stage the stoop with a small bench or pair of chairs, a doormat, and potted coastal plants like lavender or succulents.
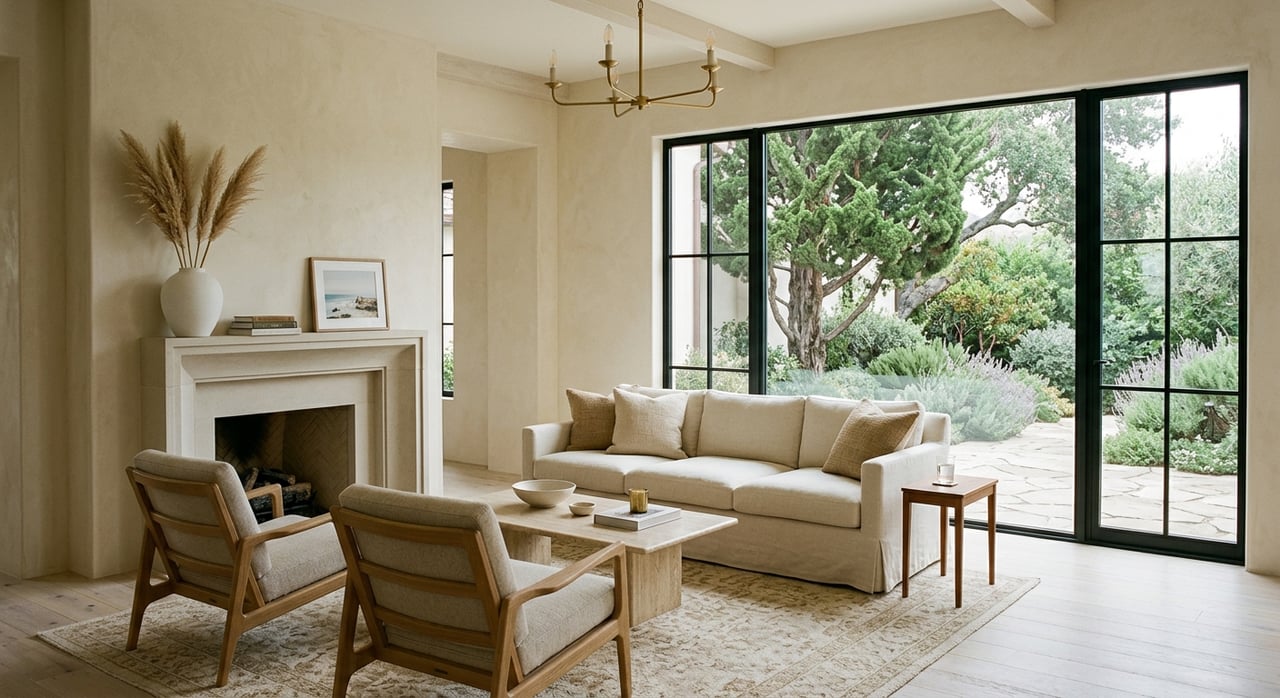
Living room and fireplace
- Make the fireplace a simple, elegant focal point. Keep the hearth tidy with minimal decor such as a woven wood basket and one tasteful mirror or vintage art piece above.
- Arrange seating for conversation without blocking built-ins or windows. Allow the eye to land on key features.
- Layer lighting. Use overhead if present, plus table or floor lamps to brighten corners. Select warm, high-CRI bulbs to photograph true to color.
- For low ceilings, choose low-back seating and keep vertical decor restrained.
Kitchen
- Clear counters of clutter. Keep out only a cutting board, a small plant, and perhaps a bowl of lemons for color.
- Stage cabinets and pantry lightly to show capacity. Use matching containers or neatly stacked linens.
- Clean and polish original tile, sinks, and hardware. If a dated counter distracts, add a runner or a curated vignette rather than replacing materials.
Bedrooms
- Scale the bed to the room. Opt for platform or low-profile frames if ceilings are low.
- Keep textiles neutral and layered. Avoid heavy coastal themes that compete with the home’s authenticity.
- Maximize light by clearing sills and using sheer window coverings. Show tidy closets with coordinated hangers and a few folded linens.
Bathrooms
- Deep clean grout and fixtures. Regrout and recaulk where needed for a fast, high-impact refresh.
- Use a clear glass or quality fabric shower curtain. Display fresh neutral towels and keep counters nearly bare.
- Emphasize original tile or vintage fixtures as features, not flaws.
Outdoor rooms and courtyards
- Treat patios and gardens as living spaces. Add a bistro set, weatherproof pillows, and a neutral outdoor rug.
- Clear pathways and remove dead plant material. Reveal sight lines to trees, streetscapes, or a glimpse of the ocean if present.
- In smaller yards, show versatility with seating, compact planters, and a small grill.
Reversible upgrades and conservation-minded touches
- Use temporary window film for privacy or to soften harsh light if window replacement is not an option.
- Choose plug-in sconces or floor lamps instead of new hardwired fixtures.
- Clean and restore wood, tile, and metal using gentle methods. Avoid abrasive treatments that remove patina.
Know the local rules
Carmel-by-the-Sea places a high value on preserving village character. Exterior changes, certain landscaping modifications, and new signs or lighting can require design review or permits. Before altering historic elements such as windows, built-ins, or structural features, consult the City’s planning and preservation guidance. Keep exterior staging reversible and in line with local expectations.
Photography and media that sell charm
Media goals
- Communicate authenticity and warmth while making rooms feel bright and spacious.
- Feature cottage-specific highlights like the fireplace, built-ins, and mature gardens.
- Produce assets suited for premium marketing: hero exterior, twilight, wide interiors, detail shots, floor plan, and a virtual tour.
Priority shot list
- Hero exterior during soft light.
- Entry that shows the view into living space.
- Living room with fireplace centered or visible.
- Kitchen with a wide shot that shows layout and flow.
- Main bedroom with natural light and appropriately scaled bed.
- Bathroom focused on clean tile and fixtures.
- Courtyard or garden staged for living.
- Detail shots of hardware, beams, and textured walls.
- Neighborhood cues that highlight proximity to downtown or the beach without showing private neighbor areas.
- Twilight exterior for emotional appeal.
- Optional: floor plan and a 360-degree virtual tour or guided video.
Style and technique
- Hire a photographer experienced with small, historic coastal homes. Wide-angle lenses help, but correct distortion in post.
- Use bracketed HDR to balance bright windows with interior shadows. Match white balance for natural color.
- Shoot interiors during overcast, morning, or late afternoon for soft, even light. Open sheers to bring daylight in.
- Include subtle human-scale cues such as a cup on a side table or a book stack to suggest lifestyle without clutter.
Tours, drone, and neighborhood context
- A 360-degree tour helps explain irregular floor plans and sight lines. Include a clear floor plan for orientation.
- Drone footage can show proximity to the beach and village. Confirm rules and privacy considerations before flying.
- Short video clips for social can highlight flow from the front door to the garden, while stills anchor your MLS presence.
MLS and disclosure
- If you use virtual staging, label it clearly per MLS guidance. Do not exaggerate room size, views, or condition.
- Provide at least one unstaged or minimally staged photo when virtual staging is used.
- Follow FAA and local rules for aerials and avoid capturing private neighbor spaces without permission.
Timeline and cost basics
Typical timeline
- Initial consult for staging and media planning: 1 to 3 days to schedule.
- Light staging, decluttering, and refresh work: 2 to 7 days depending on scope.
- Rental furniture delivery and install: 1 to 3 days.
- Photography: 1 day on site, with extra time for weather-dependent twilight or exteriors.
- Listing launch: after final images, floor plan, and disclosures are approved.
Cost considerations
- Light styling and decluttering are the most budget friendly. Full furniture rental and professional staging cost more and are typically priced per room or per home.
- Ask for line-item proposals that include delivery, install, and rental duration. Confirm the staged-room shot list to align with the media plan.
Coordination tips
- Keep a clear objective list: protect historic fabric, maintain layouts for photos, and schedule showings to preserve staging.
- Create an as-staged list for open houses that includes lighting levels, linens, and tabletop arrangements to reset easily.
Legal and preservation notes
- Avoid removing or altering historic features without the proper approvals.
- Keep staging non-discriminatory and welcoming to all. Do not imply a preferred occupant type.
- Confirm whether any exterior or structural changes require review or permits. Save receipts and document changes for transparency.
Quick checklists
Staging checklist for Carmel cottages
- Highlight one authentic focal point per room, such as a fireplace, beam, or built-in.
- Open window treatments and clean glass for maximum daylight.
- Scale furniture to the room. Remove any piece that blocks circulation or sight lines.
- Stage at least one outdoor seating area to show added living space.
- Use neutral, warm textiles and a few period-appropriate accents.
- Photograph during soft light with professional equipment.
Photographer shot checklist
- Hero exterior (daylight)
- Twilight exterior
- Living room with fireplace
- Kitchen wide shot
- Main bedroom
- Courtyard or garden
- Detail features like hardware and beams
- Floor plan and 360-degree tour
Questions to ask during your consult
- Which original features should we showcase first?
- Which items will be rented versus brought in by the stager?
- Do any planned changes require city review or permits?
- Can we see a line-item estimate and rental timeline?
- How will you coordinate staging removal for showings and open houses?
- Which photographers are best for small, historic coastal homes?
Next steps
Staging a Carmel cottage is about balance. You want to honor handcrafted details while giving buyers the bright, open feel they expect in a premium listing. With a clear plan, reversible updates, and thoughtful media, you can protect the character that drew you to the home and still stand out online.
If you are preparing to sell in 93921, work with a local, boutique advisor who understands the nuances of historic cottages and premium presentation. Request Your VIP Listing Consultation with Susan Clark to set a staging and media plan that elevates your home’s charm and maximizes value.
FAQs
What makes Carmel cottage staging different?
- Buyers value authenticity as much as brightness. Focus on preserving original features while using reversible updates that improve light, flow, and photography.
Do I need permits for staging changes in 93921?
- Many staging steps are temporary, but exterior changes or alterations to historic elements may require review. Check with the City before making anything permanent.
How can I brighten rooms with leaded windows?
- Remove heavy drapes, use sheers or linen panels, add mirrors to reflect light, and layer warm, high-CRI bulbs for a natural, luminous look.
Should I paint original wood or beams?
- Avoid painting original materials if the patina is part of the cottage character. Clean and lightly restore instead, and use neutral furnishings to calm the palette.
How long does staging and photography take?
- Plan 2 to 7 days for light staging and refresh, plus 1 to 3 days for furniture install if needed. Photography typically takes 1 day, with flexibility for weather.
Are drone photos helpful for Carmel listings?
- Drone images can show proximity to the beach and village. Confirm FAA and local rules, and avoid capturing private neighbor spaces without permission.